【ImageJ】2D stack画像の範囲を指定して複数スライスの画素値を置換する

Skull-san
今回は2D stack 画像の画素値を変更するマクロを紹介します。
それだけの記事です。
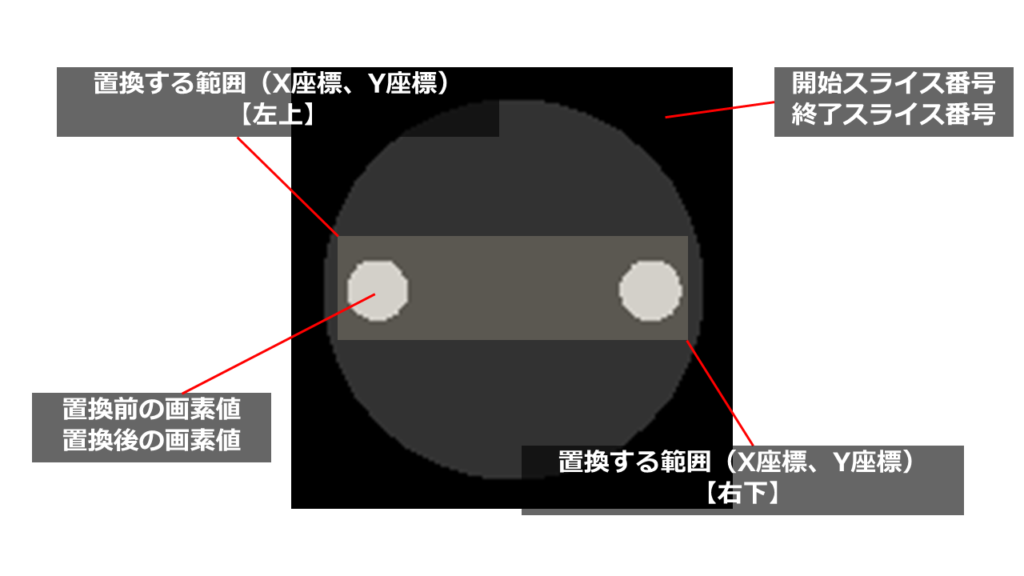
処理する画像は以下です。ImageJで開いておいてください。

内部の球の画素値を100から200に変更するのが目的です
処理する前に以下の情報について手元に用意してください。
置き換える前の画素値
置き換えた後の画素値
処理する最初のスライス番号
処理する最後のスライス番号
処理範囲の開始点(X座標) 左上
処理範囲の開始点(Y座標) 左上
処理範囲の終了点(X座標) 右下
処理範囲の終了点(Y座標) 右下
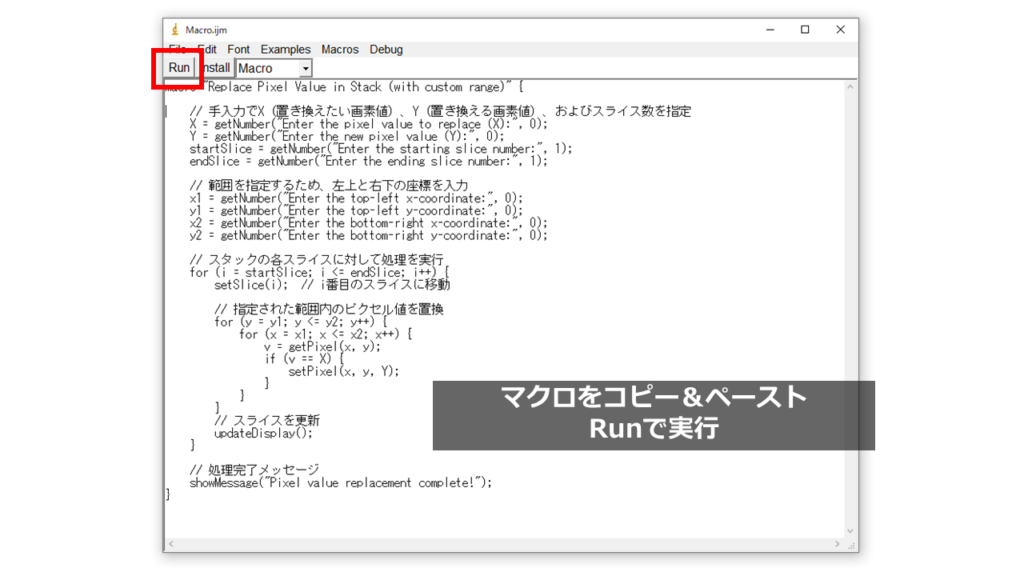
マクロを新規で作成します。

以下のマクロをコピー&ペーストしてください。
macro "Replace Pixel Value in Stack (with custom range)" {

    // 手入力でX(置き換えたい画素値)、Y(置き換える画素値)、およびスライス数を指定
    X = getNumber("Enter the pixel value to replace (X):", 0);
    Y = getNumber("Enter the new pixel value (Y):", 0);
    startSlice = getNumber("Enter the starting slice number:", 1);
    endSlice = getNumber("Enter the ending slice number:", 1);

    // 範囲を指定するため、左上と右下の座標を入力
    x1 = getNumber("Enter the top-left x-coordinate:", 0);
    y1 = getNumber("Enter the top-left y-coordinate:", 0);
    x2 = getNumber("Enter the bottom-right x-coordinate:", 0);
    y2 = getNumber("Enter the bottom-right y-coordinate:", 0);

    // スタックの各スライスに対して処理を実行
    for (i = startSlice; i <= endSlice; i++) {
        setSlice(i);  // i番目のスライスに移動

        // 指定された範囲内のピクセル値を置換
        for (y = y1; y <= y2; y++) {
            for (x = x1; x <= x2; x++) {
                v = getPixel(x, y);
                if (v == X) {
                    setPixel(x, y, Y);
                }
            }
        }
        // スライスを更新
        updateDisplay();
    }

    // 処理完了メッセージ
    showMessage("Pixel value replacement complete!");
}
対象の画像がアクティブになっている状態でRunを押します。
これで対象とした画素値が変換されます。
ぜひご利用ください。
Skull-san
今回はこれだけ!


